Themeframe (with your design and creativity) CREATES THEMES for your WordPress installation. You install your created theme into your existing WordPress installation exactly the same you would for any other WordPress theme.
See also Themeframe Layouts for more information on choosing and modifying layouts, and Themeframe Screencasts on the Themeframe website.
Getting started instructions for TF123/TF125 and Windows users, other OS may differ.
Instructions for MAC see below (thanks Juggledad)
Note some screenshots show TF123, TF12x looks a little different, new icons etc.
Use Firefox.
Install a local host. I recommend EasyPHP but several are available. If you are reading this and want the easiest option, go with EasyPHP. Install EasyPHP 5.3.8.0* (this version works, no issues) to the root folder on C ie C:/EasyPHP, not C:/Program Files/EasyPHP. *Please note this link is to Sourceforge (download at your own risk) as older versions of EasyPHP don’t appear to be available from the EasyPHP website any longer 🙁
 Download and unpack the Themeframe zip folder.
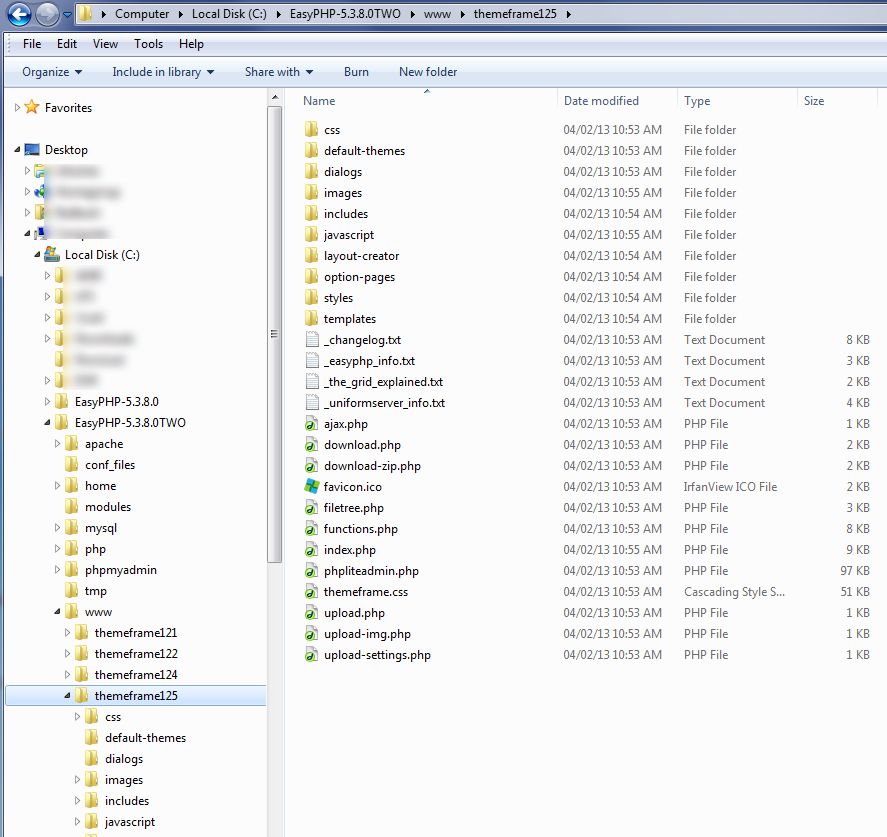
Drop the unpacked themeframe folders and files into c:/EasyPHP/www
I have two installs of EasyPHP, one for earlier versions of TF, and one for TF123 and up. By doing this you can open earlier TF’s, export their settings, then close that TF AND close/stop that EasyPHP, then open/start the other installation of EasyPHP and later TF and import the settings of that theme. I found this the safest option, trying to avoid trashing earlier TF themes and not taking the chance at corrupting later versions of TF. Your unpacked themeframe files dropped into www, see screenshot example.
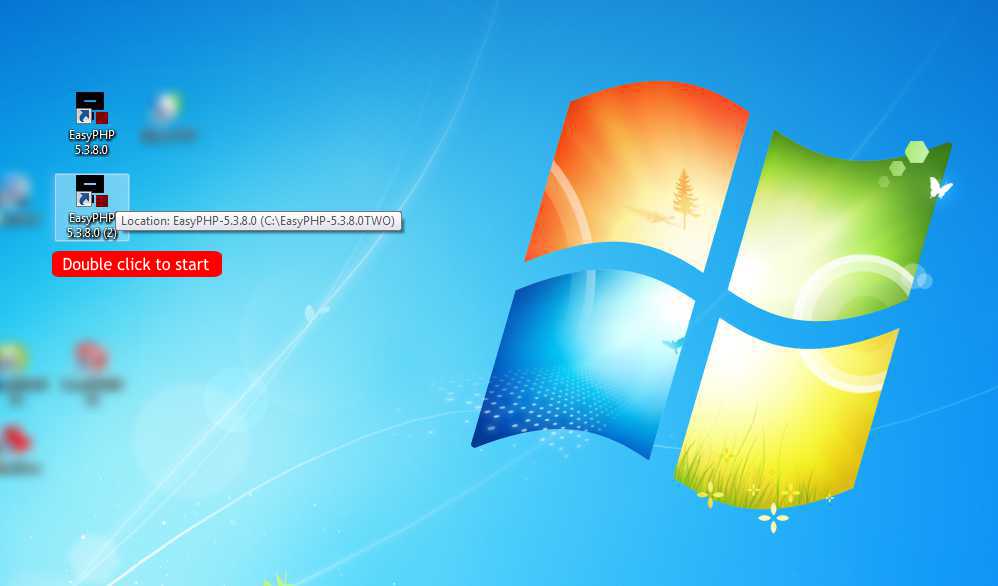 START EasyPHP – if you created a desktop icon double click it. Wait till its loaded, THEN you must right click EasyPHP from the taskbar, and choose “Administration”.
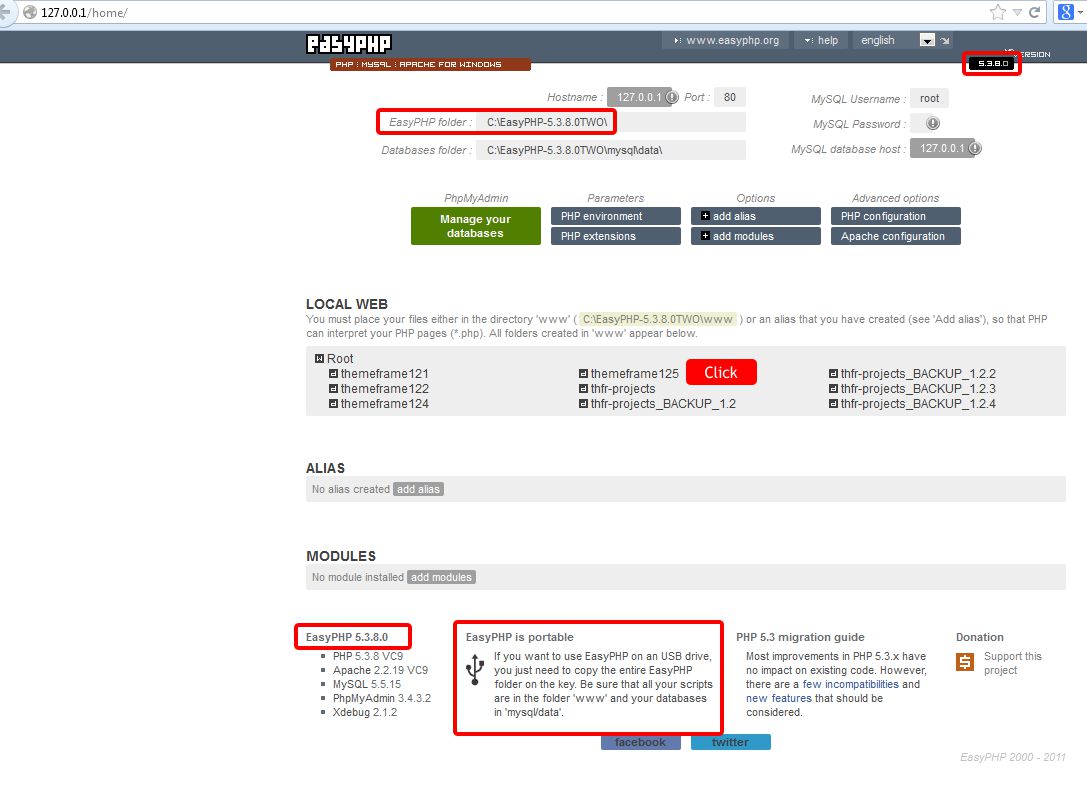 That will open an EasyPHP browser window where you select themeframe from the “Local Web” under the active root folder.
That will open a new browser window with Themeframe up and running.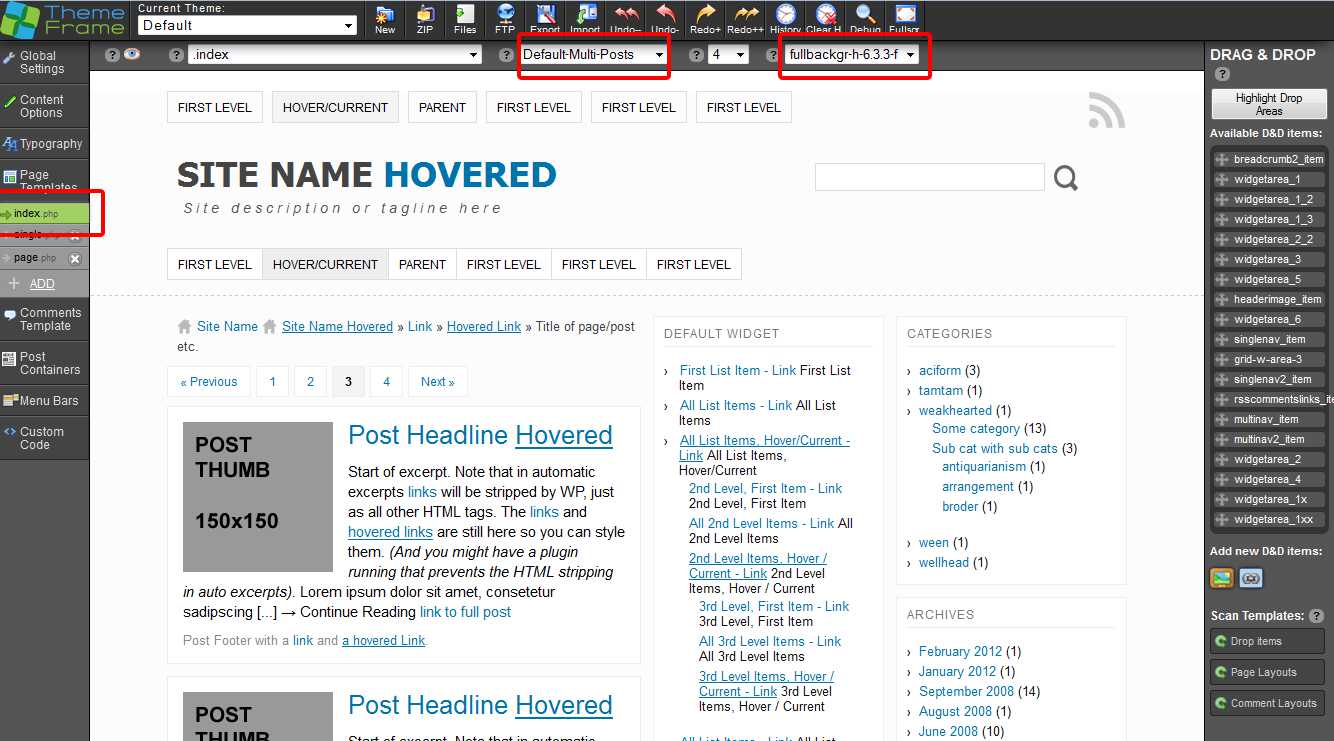 Note screenshot shows TF123, later TFs look a little different, new icons etc.
On the MAC
1) Install MAMP
2) look in the applicatons folder for MAMP open this folder
3) Look for a folder ‘htdocs’ put the themeframe1xx folder in it
4) use http://localhost:8888/themeframe1xx
You should be in themeframe now.
That’s it for the installation, now to pop out a theme!
Very briefly:
- Style layout in “Page Templates” (side navigation) index.php. You can even delete all page templates except index.php, do all your styling, then make page.php, home.php, archives.php etc etc based on your index.php, if you need/want other page templates.
- Do all Menu styling from “Menu Bars”, not on page templates.
- Make global text changes in Typography, not on a page template (unless you want specific changes on a specific page template).
- “FTP” (from top navigation) your theme direct to WP site or make a zip and upload as you would any other theme.
Now in more depth:
You can then either work on a theme from ground up, starting with the default theme loaded (recommended), or import a themeframe settings txt file from a previously created Themeframe theme.
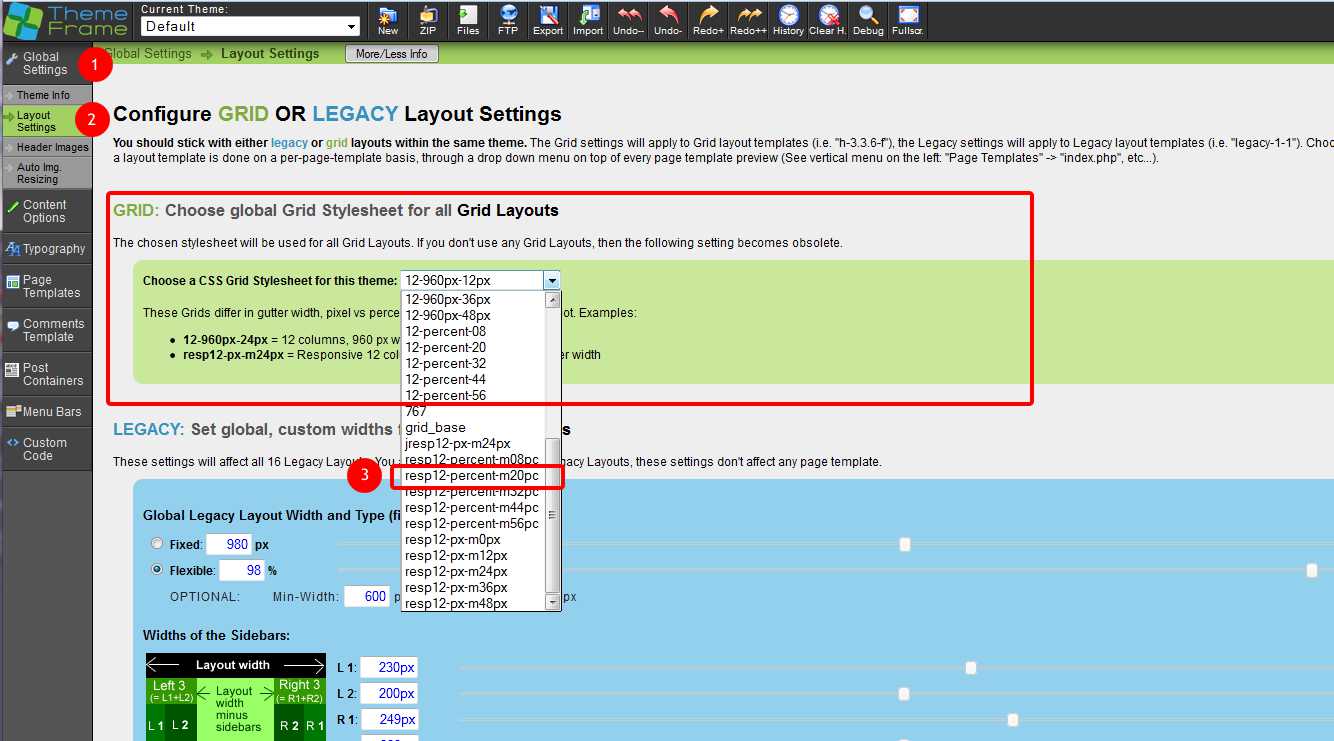 First, setup the layout for the theme you want to create/edit.
If you choose a grid based layout, the Legacy settings MEAN NOTHING, so dont bother touching them. Choose a “Responsive” layout from the dropdown list (only a recommendation, just do it).
Pick any responsive layout you want, play with different ones, but pick one, you can change it later.
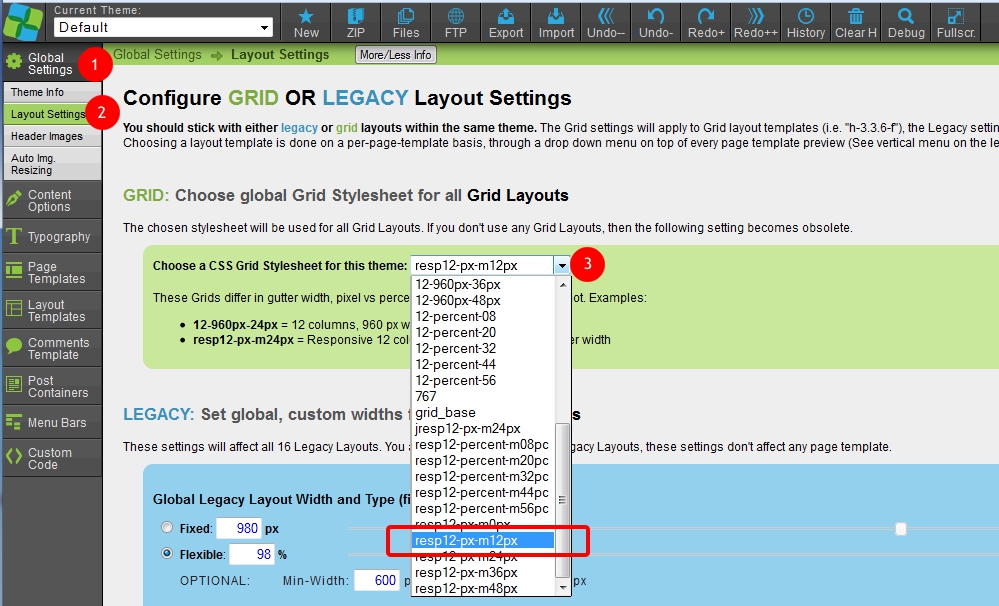 A px based resp will give you a max width and still responsive layout, see screenshot (TF125).
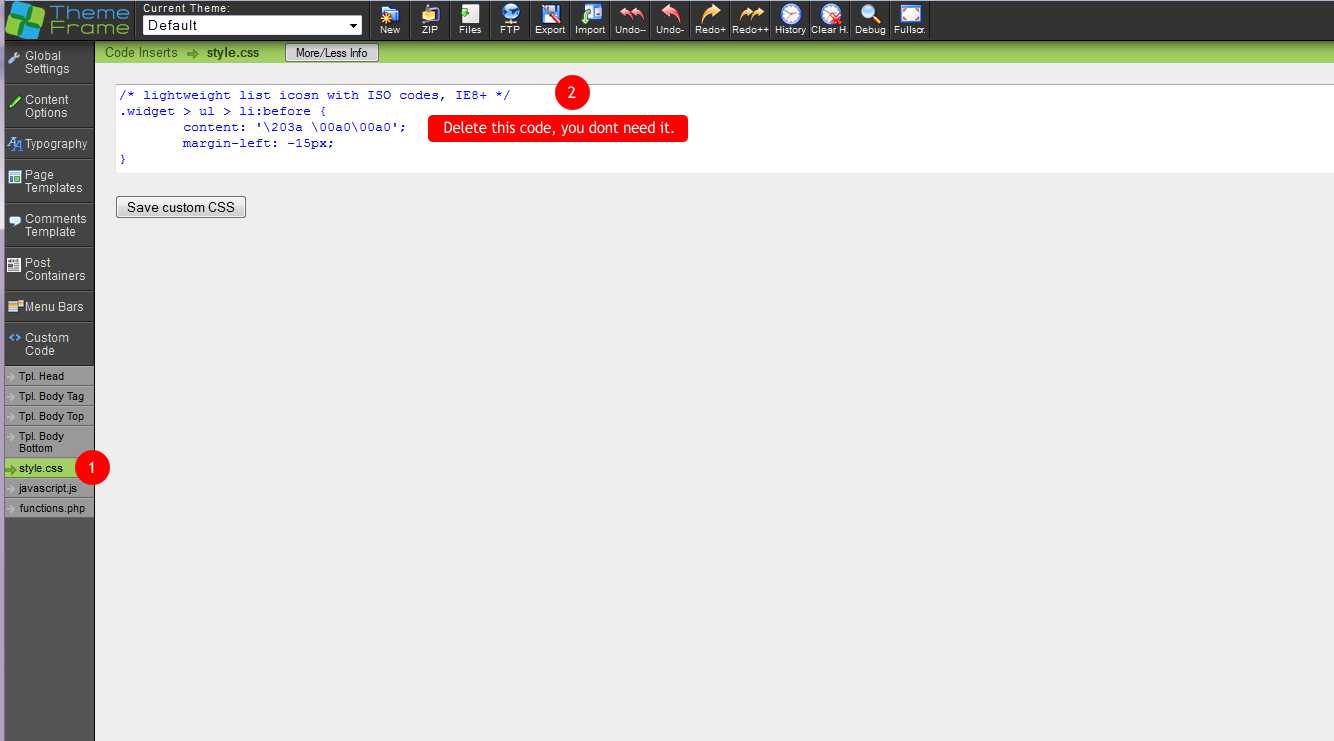 Next (optional), some basic code removal/additions to give us a responsive layout but with a maximum page width. Go to Custom code, remove any code that was there.
Edit for TF125: This code insert below is now not required to get a max width and still responsive layout. I am going to leave this code here as it can give you more control if you want to get a max width on a responsive layout via this method.
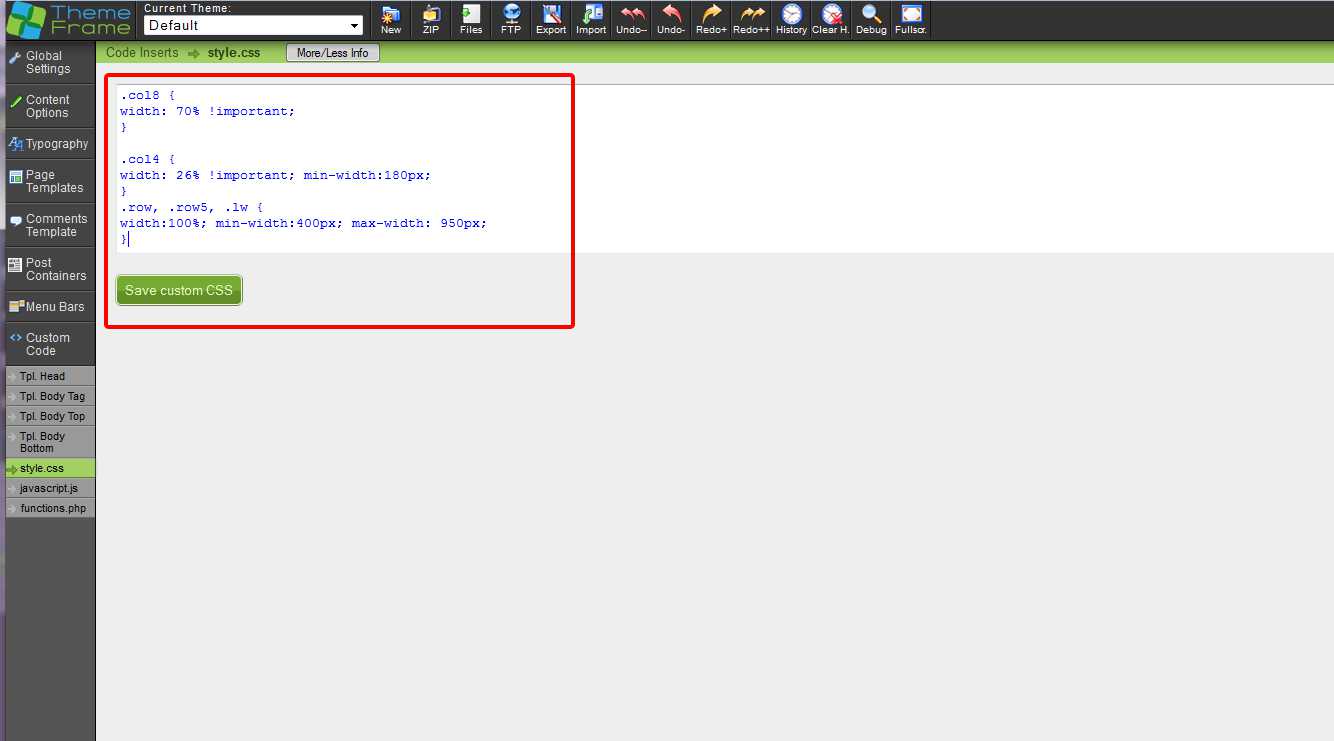 Add:
Add:
.col8 {
width: 70% !important;
}
.col4 {
width: 26% !important; min-width:180px;
}
.row, .row5, .lw {
width:100%; min-width:400px; max-width: 950px;
}
Now, Ive played with these settings, and while they might not be correct – they work! So do you’re own playing, but this will get you started.
Please note: With TF125 you will need to modify (or delete) these figures if you have created a custom layout with the Layout Creator.
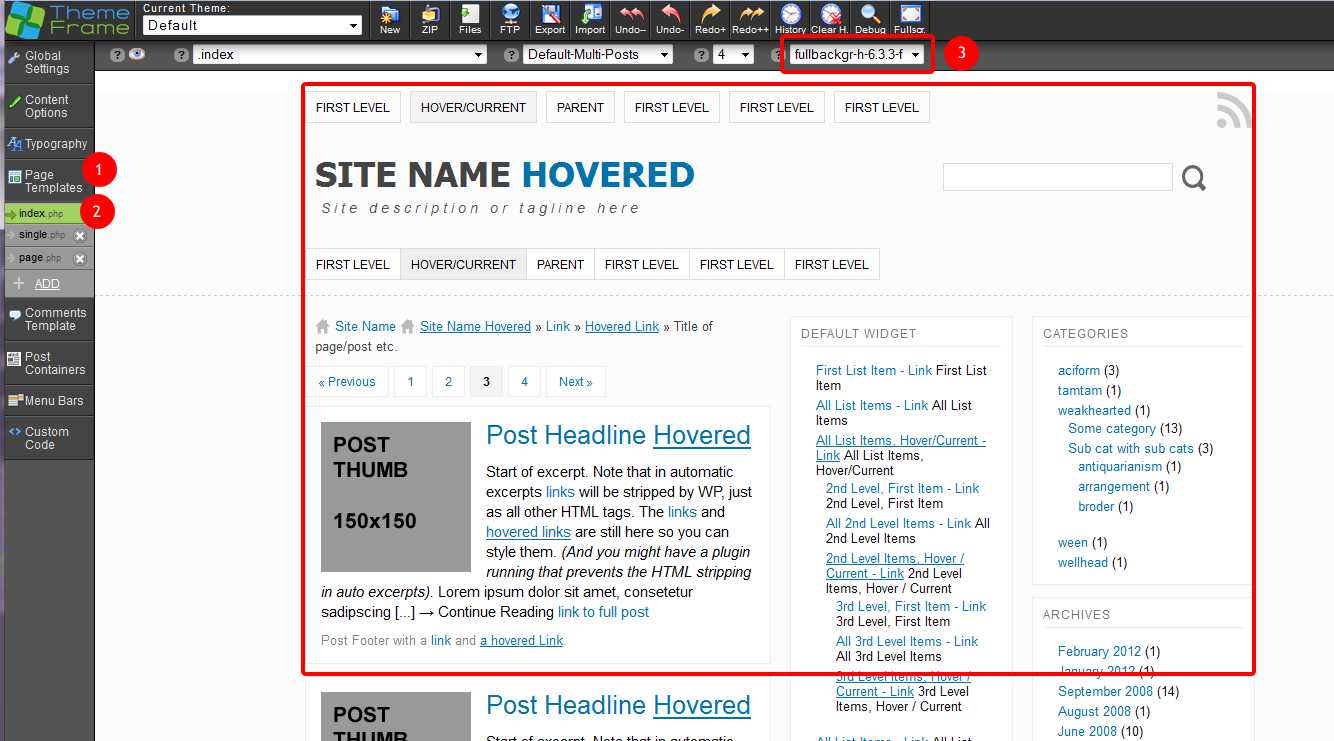 So now you have a responsive layout, with a maximum page width (either from code insert above, or by choosing a px based layout in Global Settings/Layout Settings), now choose a full background page template. Again, you can choose something else from this list, but for the purpose of popping out your first theme, just choose a full background template or create your custom layout with the Layout Creator.
Make sure you choose the same page layout for all page templates ie page.php, single.php (or you can choose another layout if you have a good reason to).
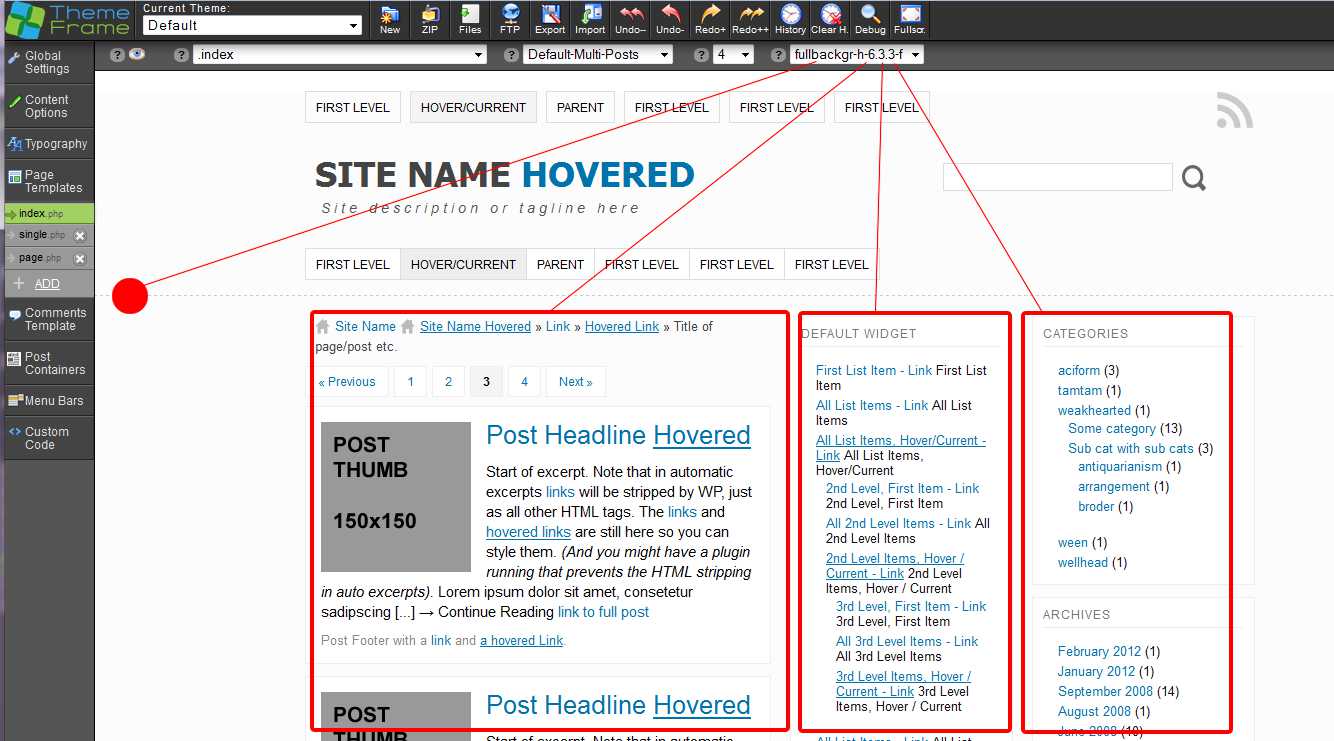 This screenshot shows the 6 3 3 and full background. 6 is the content, followed by two sidebars (3 and 3). Full background you can see bleeds off both sides, but thanks to our code insert we now have a max page width.
The Layout Creator
You can also see more in Choosing and Modifying layouts.
This section is also “optional”. You dont need to touch the Layout Creator to pop out your first theme.
 The Layout Creator makes reorganising your layout HEAPS easier.
You can now choose the width of sidebars (and main content) from the 12 column grid.
Create a custom layout like example shown.
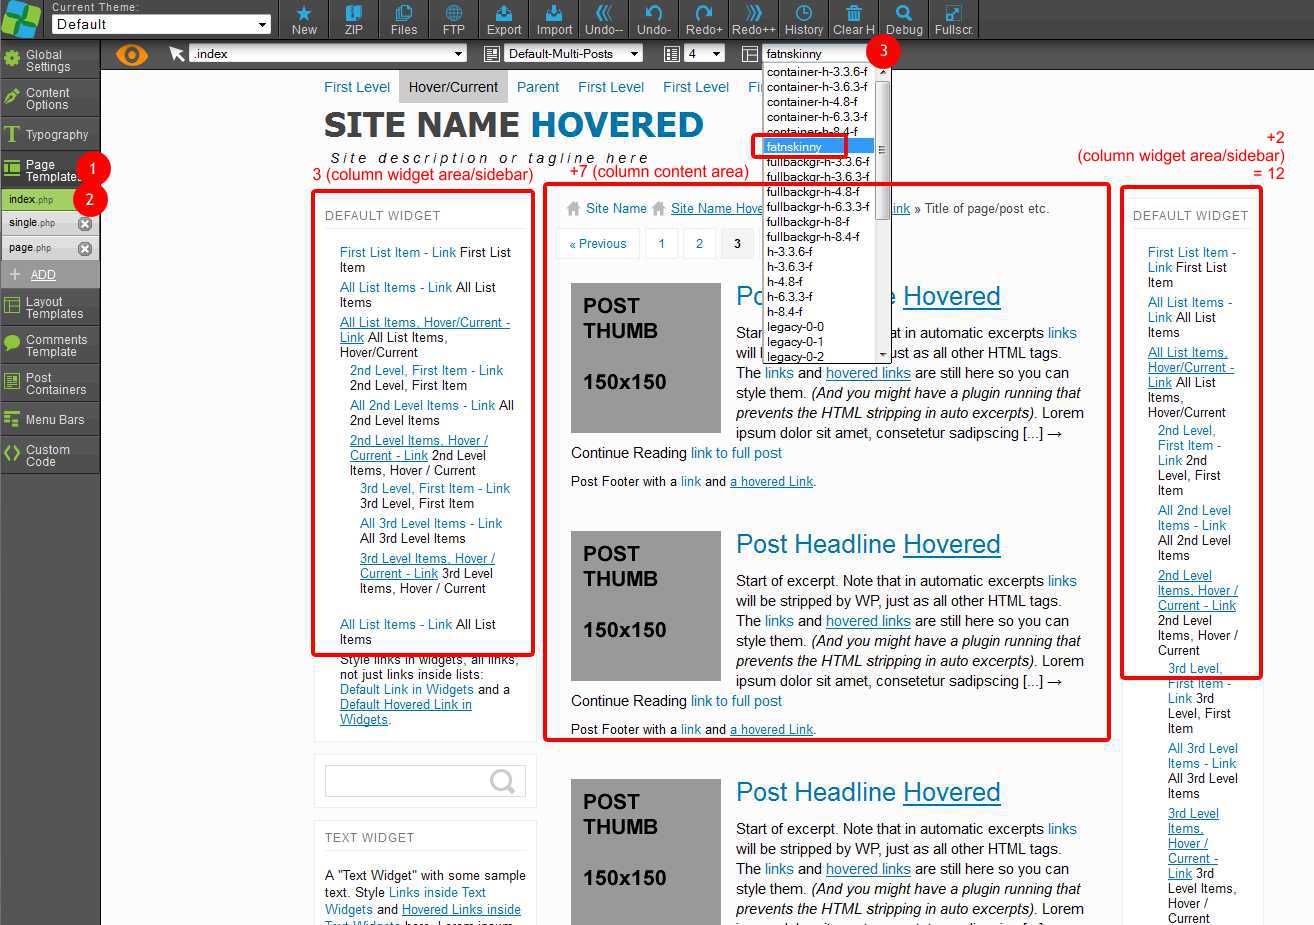 Choose that custom layout you just created, and the result is a wide left sidebar and a thin right sidebar.
 Now it’s play time!
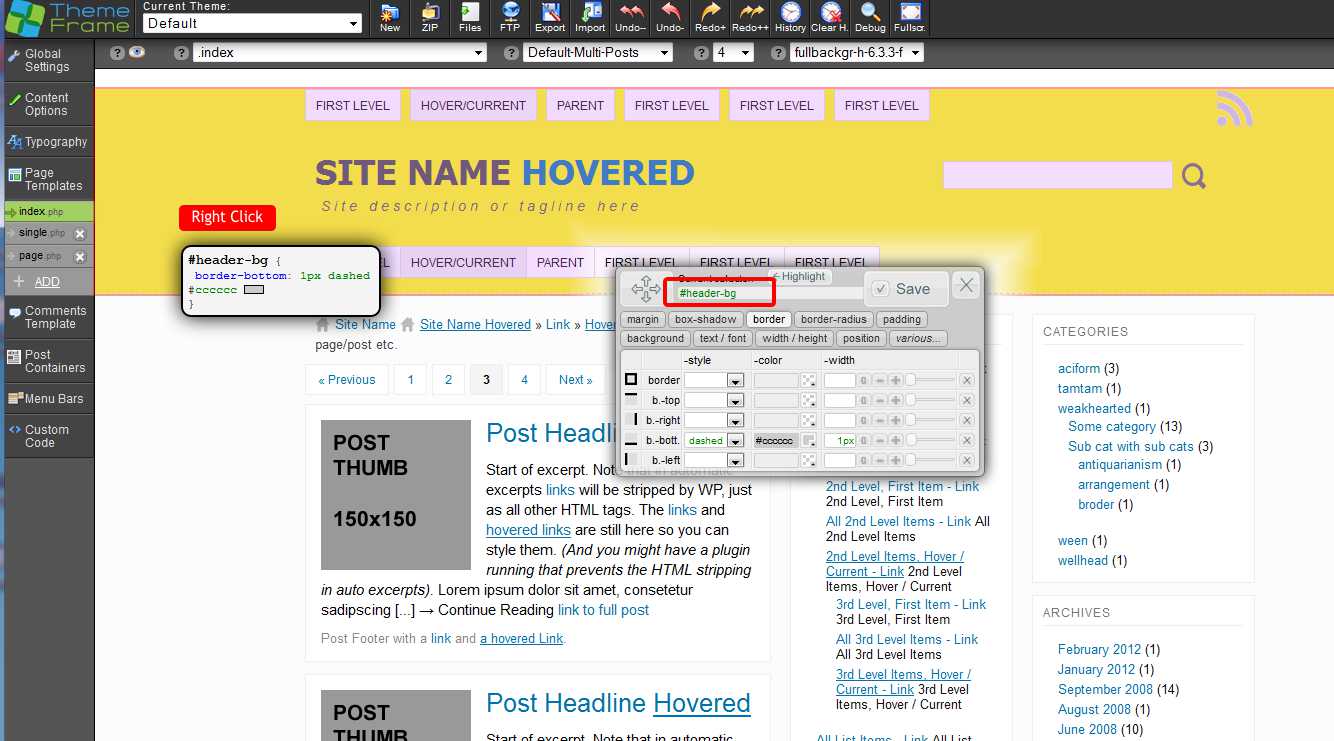
Right-click any element you want to style, make your changes and it’s saved real time.
Any changes you make are automatically saved in that theme. Do AS MUCH LAYOUT STYLING AS POSSIBLE in index.php, THEN, make additional changes to the other page templates if you want to. Do global text styling in Typography, and Menu styling in Menu Bars.
Click and drag any drag n drop items to add/remove to/from the drag n drop area on your right. You dont want/need nav2? Then drag it off your theme! Want to move it? Just drag it to any available drag n drop zone.
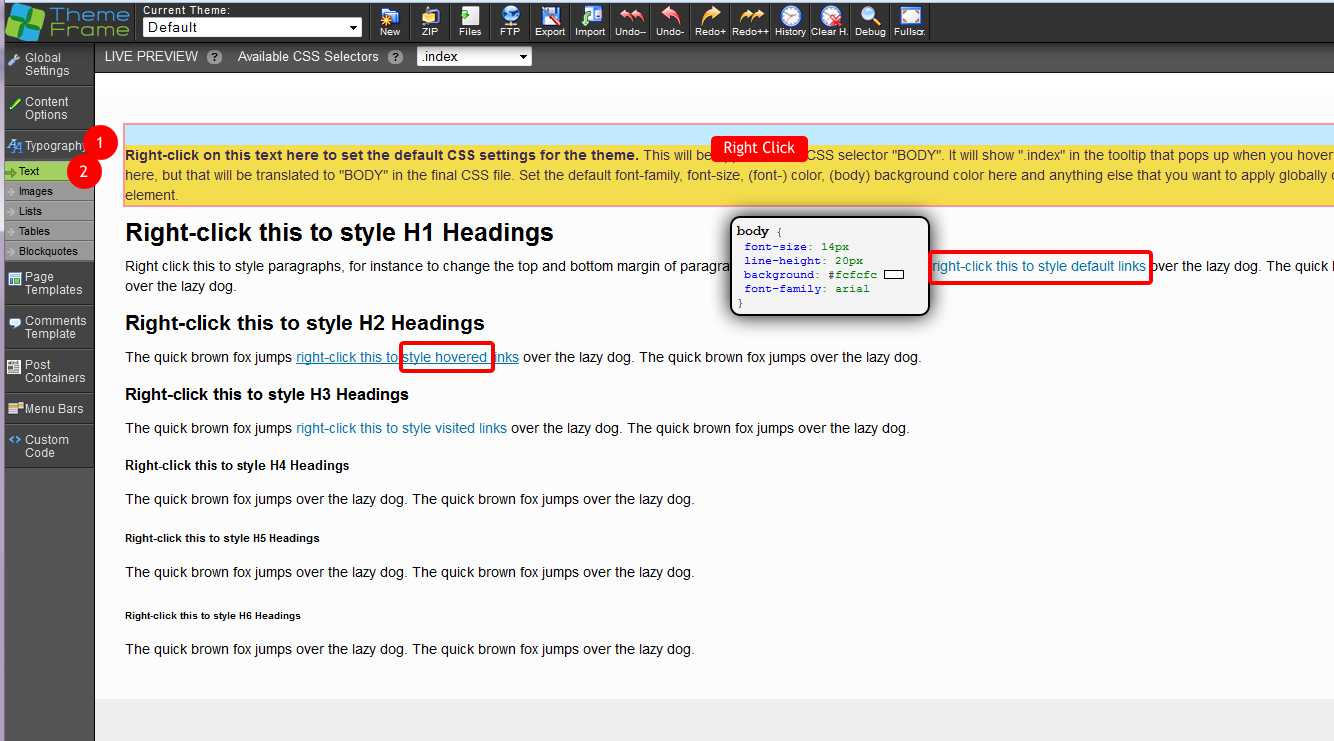 Global text changes – DON’T make these changes on index.php, make them through Typography, see screenshot.
You will only make text changes on individual page templates if you want the text on that particular page template to behave differently to site wide text.
 Menu changes – ONLY make these changes in Menu Bars settings, see screenshot. Always start from top left and work down and across (if you need to style further).
You will only make Menu changes on individual page templates if you want the Menu on that particular page template to behave differently to the site wide Menu.
Style as much as you want, change background colours, text size, colour, line height, padding, borders, box shadows to any or every element.
That’s it!
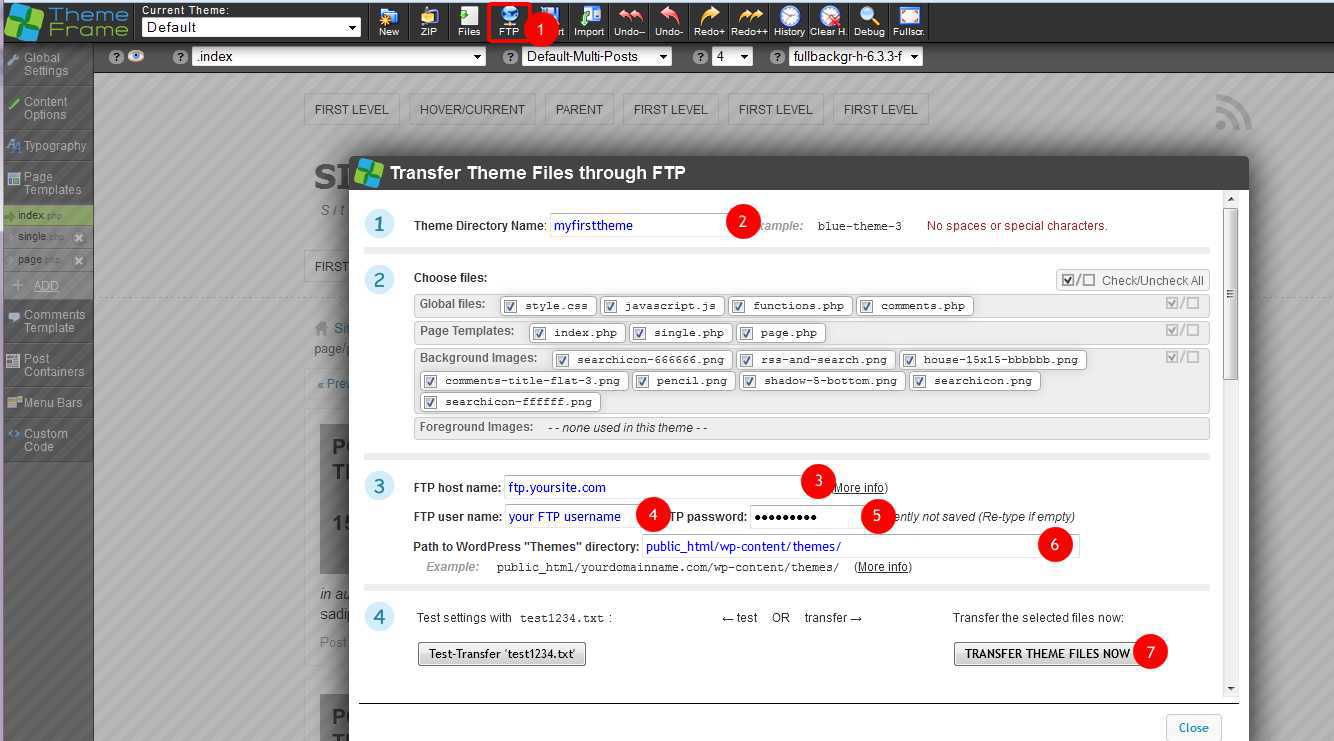 Once you are happy with the theme, FTP it to your WP site and select it from themes available, just as you would any other WP theme.
Make sure that the FTP address dumps your new theme in the correct wp-content/themes/ folder.
Alternatively you can export your theme as a zip file and install your theme via zip as per normal.
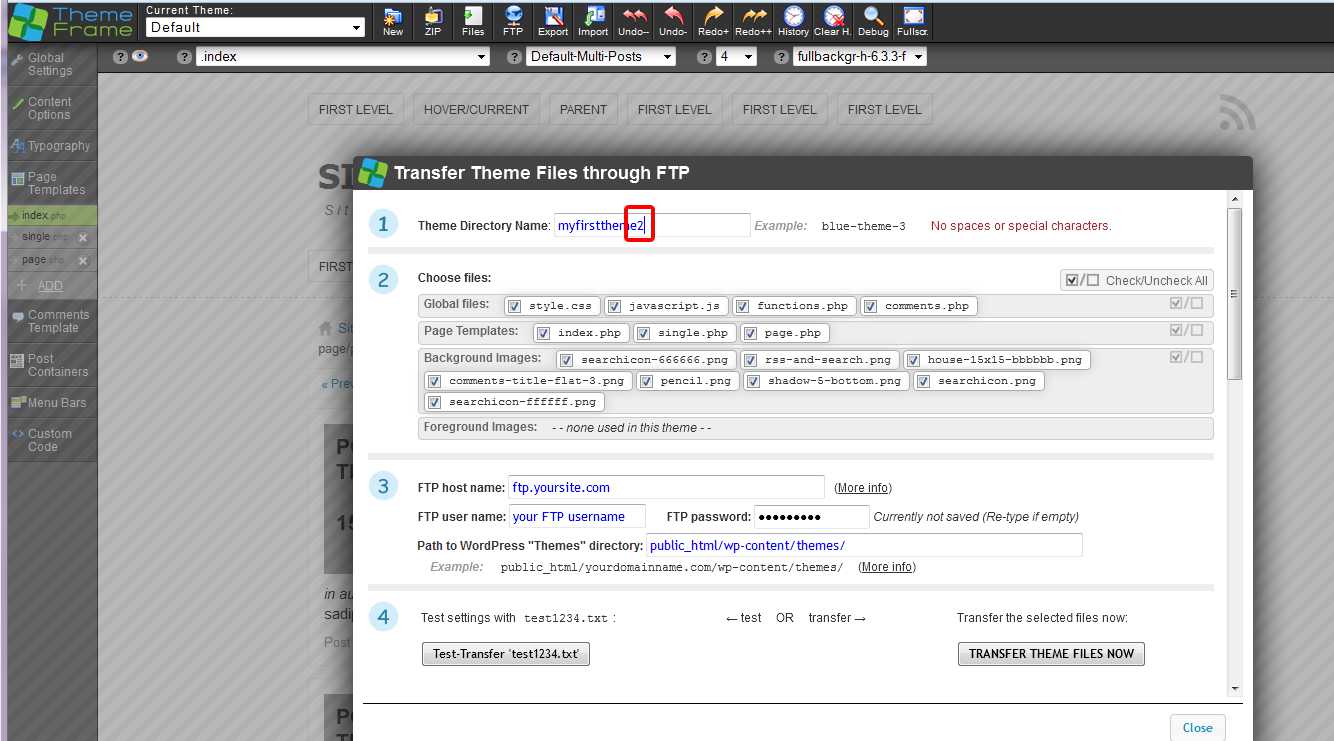
Please note: While you can make changes and FTP the theme again to an active theme while its currently being used by WP, with the current version of TF, if you FTP a revision of your theme and wish to “Preview it” (it’s not the current activated theme) THEN, you might have to rename the folder each time you upload a revision as the revised changes dont appear at all (in some cases). See screenshot, just rename the folder to which your theme is uploaded, and then when you “preview” it in WP you will see the revised theme. This is a bug I believe.
Additional tips
Choose the right Post Container
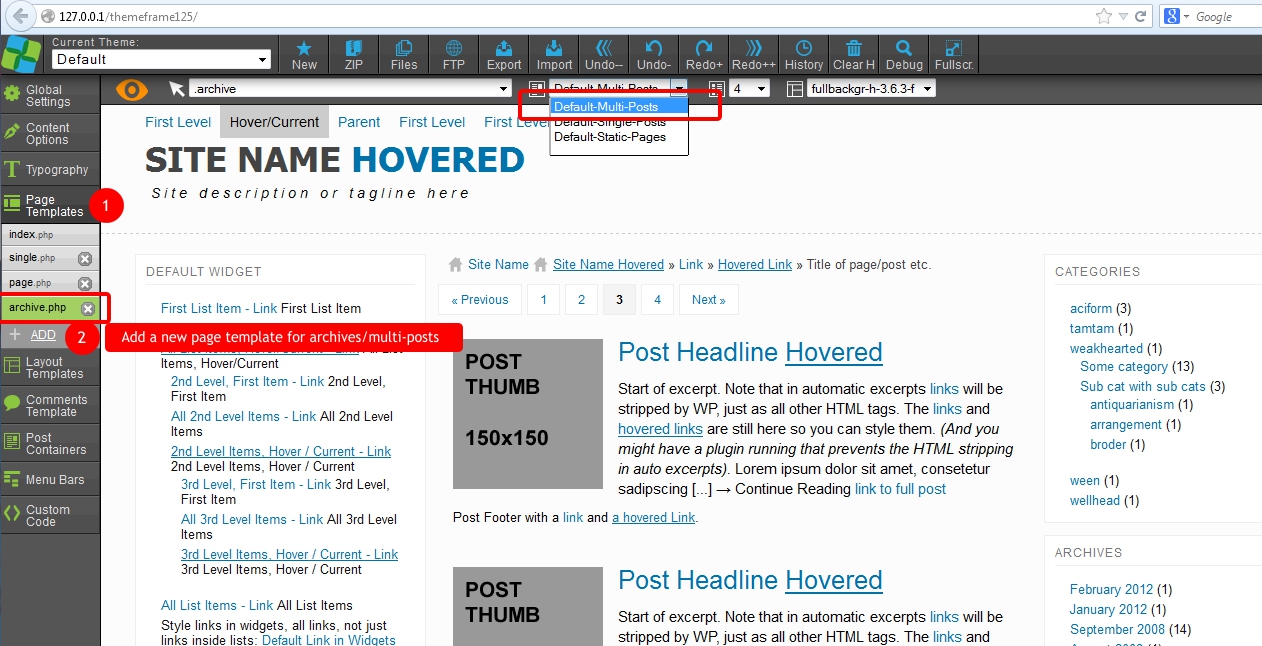 To style or edit single posts, and multi posts, you need to have a page template with single posts or multi posts in your theme. If you dont have it, add it, see screenshot.
Typically, when on a “page” template (index.php, page.php) you will want Post Container set to “Default Static Pages” (if a static page is what you want on those pages). For single posts, you style (if required) any changes to single.php and set to “Default Single Posts”. On archives or multi post pages, you will style (if required) archive.php or category.php and use “Default Multi Posts”.
It is important that these Post Containers are correct at the time of zip or FTP!
Best tip ever! – Less is better
When first using Themeframe it might seem like you are forever styling elements to over-ride CSS applied somewhere else, or it just wont show up on your WordPress site. You might be going to every page template and meticulously setting the SAME CSS over and over, in the hope it will take. WRONG. Don’t do that. The problem is probably that you have set some CSS on the index.php or in the Typography settings, and then you end up in a trail of forever applying CSS to “fix” conflicting CSS on all of the other page templates. The trick is to CLEAR and REMOVE as MUCH of the CSS applied to all page templates other than index.php. Remember to set global text changes in Typography/Text, menu changes in Menu Bars/Menu 1, and as much styling as possible on index.php. When styling widgets, remember to style the DEFAULT widget first. You also have default TEXT WIDGET.
Remember to style the root element of any item as that will flow through to all elements that inherit CSS from it.
If you still can’t “find” where some CSS is coming from, go to your problem page template, set the “Post Container” to all three types to see if the CSS is applied to a particular post container, on a particular page template. Remember to reset the Post Containers for each page template correctly BEFORE you zip or FTP the theme.
Still cant find it?
Use a code inspector!
On the live site, use a code inspector to see exactly what element and on what page template your problem is. Then modify your Themeframe theme and re-upload. The simplest, free code inspector I found (if you’re not familiar with them), was using Chrome browser, right click the problem element and choose “Inspect Element”.
A code inspector is a VERY valuable tool. Use it, and get used to it. Uncheck items to see the live effects of turning CSS off, add new CSS on the fly, it’s brilliant!
This, and all website Themes created by Redback Graphics since March 2011, are created with Themeframe.
Still stuck?
Pulling your hair out, and ready to throw in the towel? Don’t give up! Drop me an email, tell me where you are at and I’ll help you through.