See also Themeframe Basics to get you up and running.
Some additional information to walk you through the basics of choosing and modifying layouts in Themeframe.
(at the time of Themeframe125)
 So now you have Themeframe installed and running (see Themeframe Basics if you don’t), select one of the default themes to play with.
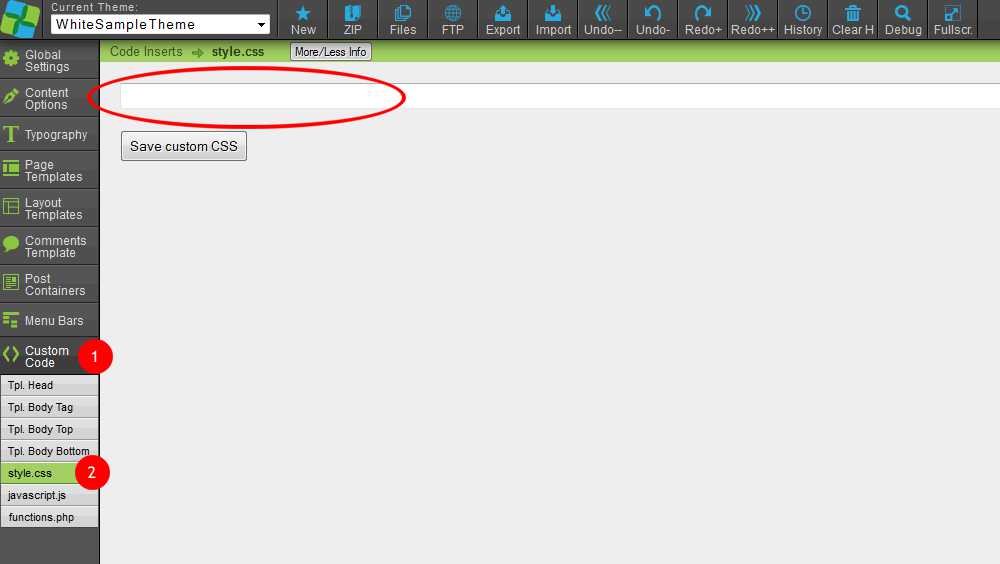
Firstly, check there is nothing in the Custom Code to complicate anything.
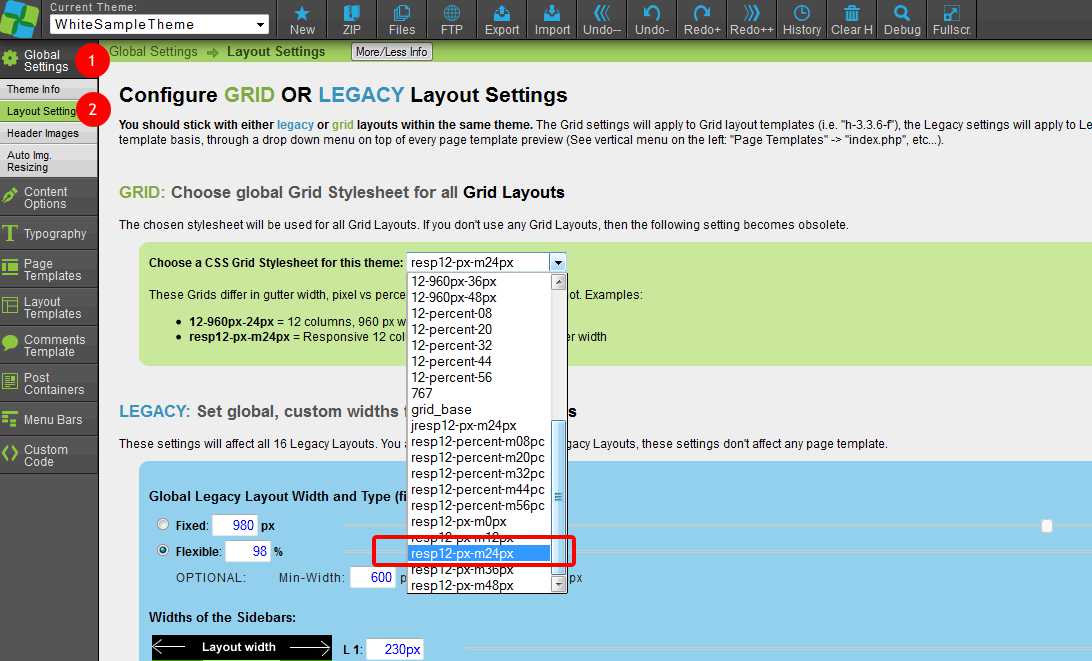
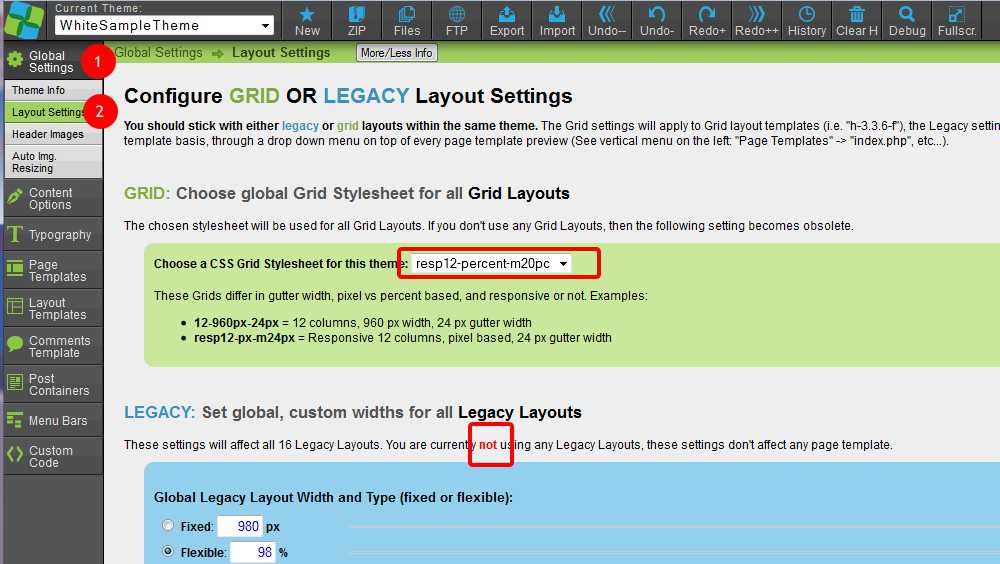 Next go to Global Settings/Layout Settings. Here you make the BIG choices. You can change these at any time to see how it effects your page layouts.
If you choose a PERCENT based responsive layout, your page will go full width and responsive. 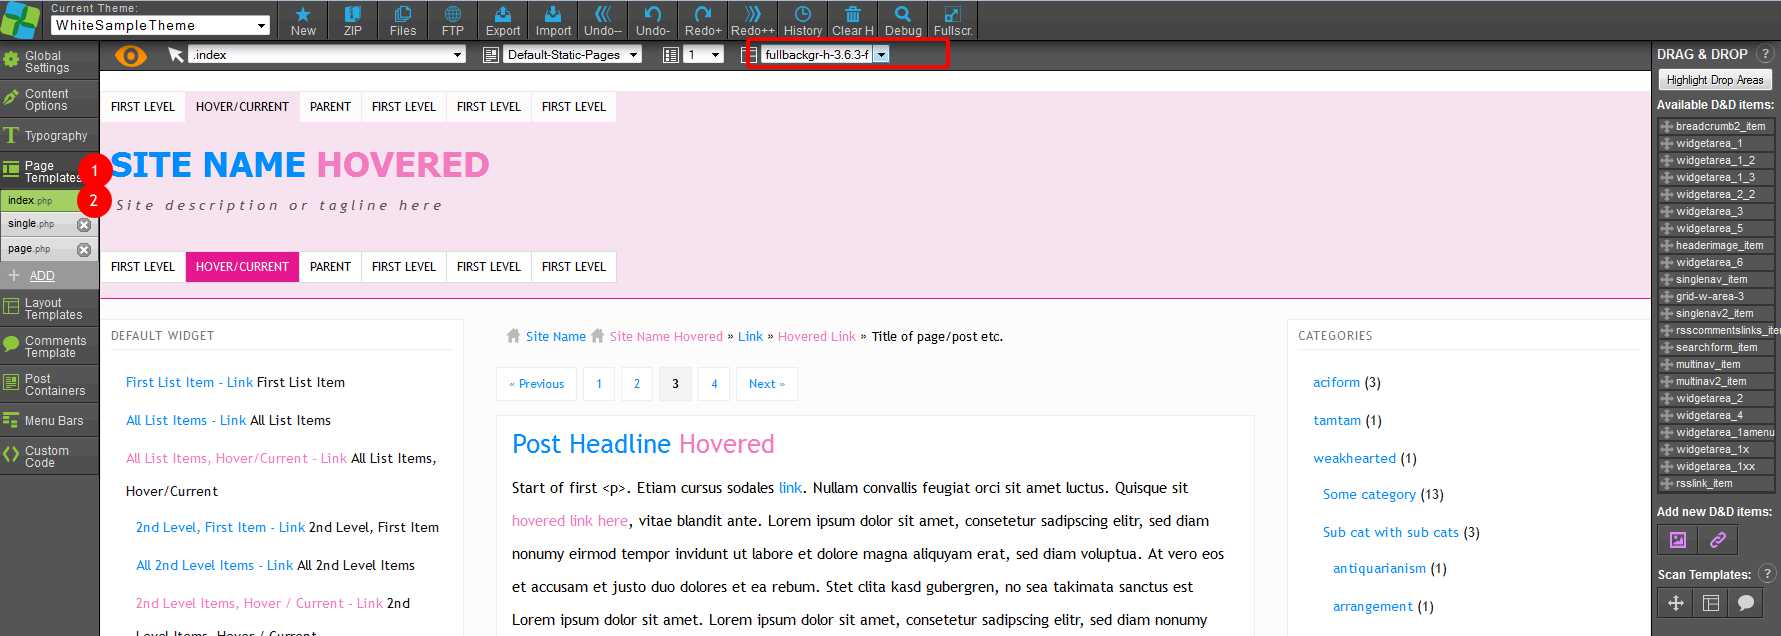 See example using that percent based layout with full background page template.
Next, we’ll change that layout but keep same page template to see the effects.
Choose a PIXEL based responsive layout, see screenshot.
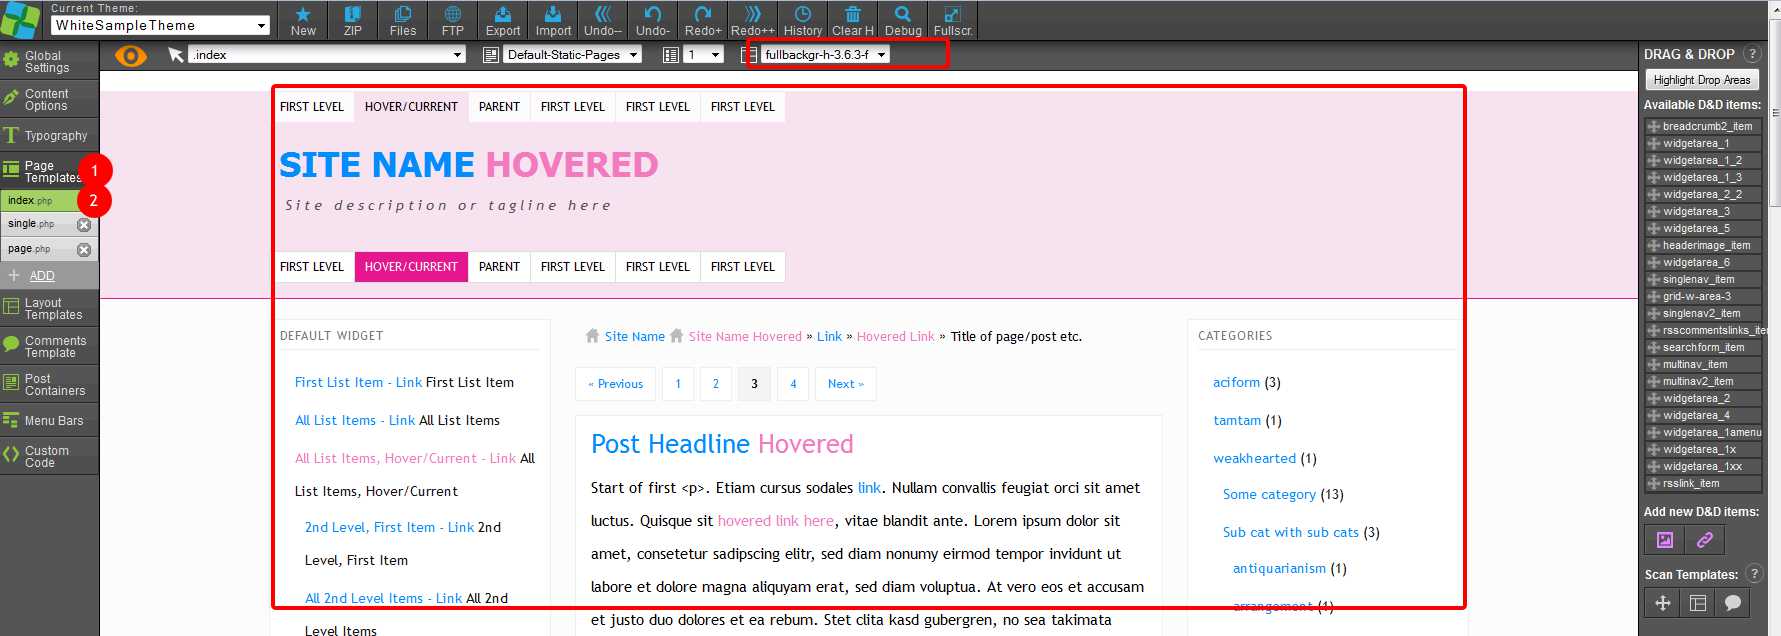
And the resulting change creates a fixed width page, still responsive, and still with full backgrounds to header, main and footer.
So they are two (of many) choices “out of the box”. Now, lets create a Custom Page template using the Layout Creator. I’ll name it to reflect the layout in column widths over the 12 column grid, so I have a 24222, 2 column sidebar + 4 column content + 2 column sidebar + 2 column sidebar + 2 column sidebar = 12 columns.
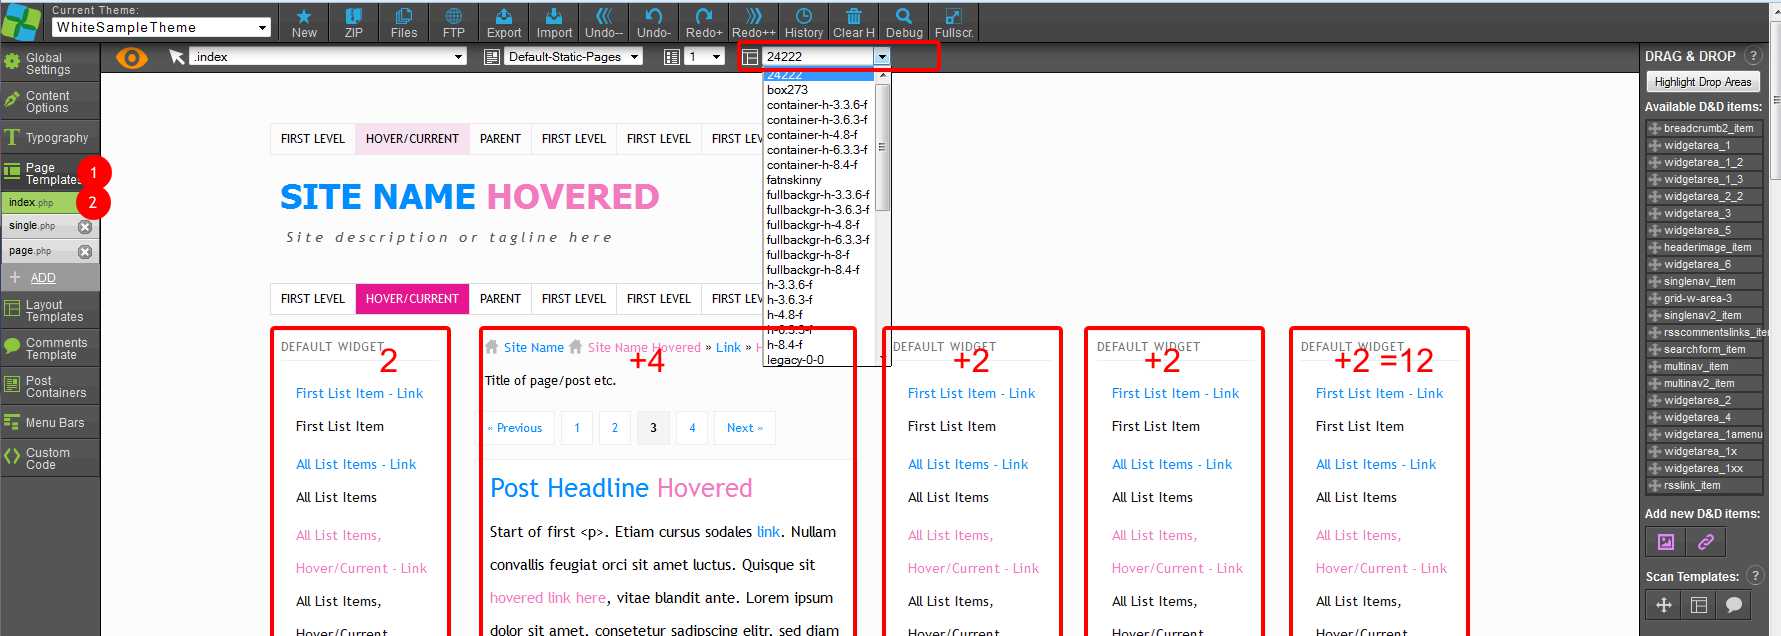 Now go to your page templates and select the new Custom Page Template you have just created to see your new layout in action.
So now you can play with your layout settings, hopefully this gives you a better understanding of how to make them work for you. Remember to use the same page layout across all page templates UNLESS you have a specific page layout you want to apply to a specific page template.
This, and all website Themes created by Redback Graphics since March 2011, are created with Themeframe.