
Customising the new websites
This will be updated as time permits. As always, clients of Redback Graphics can call (any decent hour) or email 24/7 for support. These options are only available in websites installed after October 2018.
 Log in to your dashboard and navigate to the relevant section to edit.
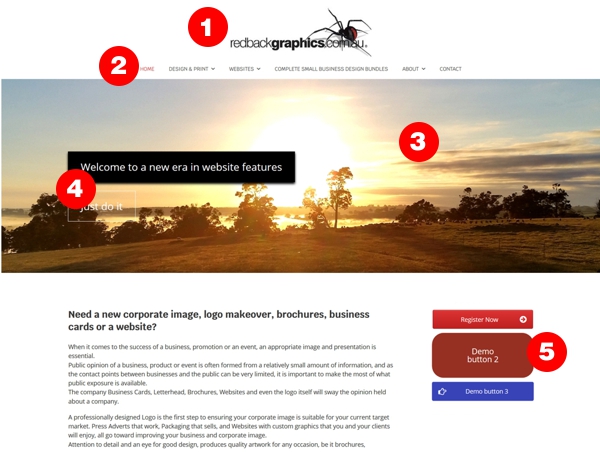
1. Updating your site logo
Appearance/Customize/Site Identity. Here you can remove or Change the current logo, and adjust the padding (the space around it).
2. Navigation Menu
Appearance/Customize/Header Colours to change Menu link, background colours, hover colours and also mobile menu colours.
To change the font and size, edit that from Appearance/Customize/Fonts and Typography. A link is provided to Google Fonts where you can choose a font, copy its name (exactly), put that in the font field for Body (page content) Heading and/or Menu. You can choose different fonts for each if you want. You can also change the size of the Menu font here, and if it will be uppercase or not.
To change the position of the navigation (and therefore logo), you can set the position of the Menu to centred, left or right justified, via Customize/Site Layout under Menu layout.
3. Full width feature image to Home page
Appearance/Customize/Homepage Settings. Remove or replace current image under “Static front page: header image.
4. Call to Action buttons on Home page.
Appearance/Customize/Homepage Settings. Under “Primary call-to-action button text”, Edit titles, colours, sizes, padding. Similar settings for “Secondary call-to-action button text” etc.
5. Call to Action buttons in the sidebar and the sidebar position.
Appearance/Customize/Widgets/Sidebar. Add or edit existing buttons here. To change the default sidebar (for any new pages) from left to right (or none), do that from Customize/Site Layout under the Menu layout options. You can also change the position of the sidebar from within any page. Edit the page, scroll down under the content editing window, and choose from the “Sidebar Layout” drop down list.
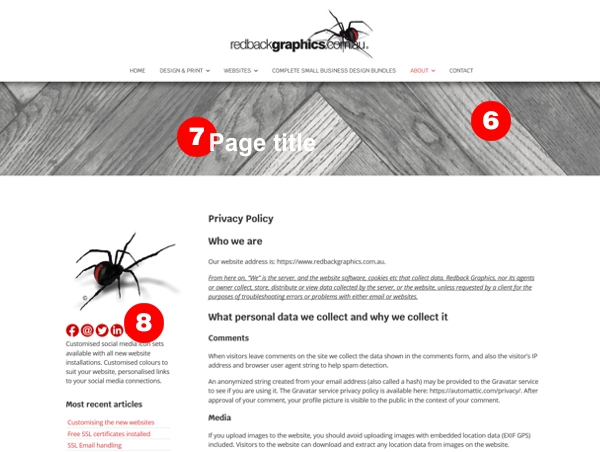 6. Add, change or delete feature image to interior pages or posts.
To edit a feature image on any page (or post), once logged in to your dashboard, navigate to that page (or post), then edit. Under the content editing section, navigate down to “Page Header Settings”. To activate a new image, click “Activate Extended Header”, then choose from your media library or upload a new image at “Header image (Add or upload)”. Update your page.
7. Hide page title from feature images.
To hide the page title from your feature image, while editing your page, scroll down to “General Settings” under the content editing section, and tick “Hide title”. If you would like a title under the feature image, just add it to the page content, and make it a Heading by choosing “Heading 2” from the editing options available above the content editing section, the “Paragraph” dropdown options. Update your page.
8. Change sidebar side, or remove sidebar.
To change the default sidebar (for any new pages) from left to right (or none), do that from Customize/Site Layout under the Menu layout options. You can also change the position of the sidebar from within any page. Edit the page, scroll down under the content editing section, and choose from the “Sidebar Layout” drop down list. Update your page.
If you get stuck, and you are a client of Redback Graphics, please call or email for assistance.