
Adding a new product
If you are using a Redback Graphics installed website, with shop function installed, add a new product following these steps.
Login to your dashboard.
 Briefly: – Add New Product, Add a Product Title, Long description, Short Description, Product Image, choose categories, set a price (if applicable), then Publish.
More detailed instruction:
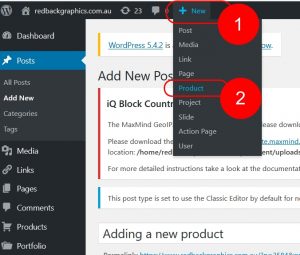
Choose Add a new (click 1) product (click 2) from your dashboard bar across the top.
Add a product Title (in the Product title field), long description (in the content field below the Product Title, Add Media button and editing icons), a Short Description (at 3) in the content field under “Product Short Description” section down the page (4).
 Add a product image from the “Product Image section on the right side of the screen, click “Set product image” (5). Upload a product image, then click the blue button in bottom right corner “Set product image”. For best results, all product images should be the same size, same shape, with adequate blank or neutral coloured background, so that the product images all display clearly and consistently throughout your range of products.
Then select the Categories applicable to your new product (from the right side also, under the “Product Categories” section), or Add a new category if required.
If your product has a price (6) (shops displaying products but not selling do not add a price), add that in the Product Data section, General tab, add Shipping class and weight if applicable in Shipping.

Finally, Publish your new product by clicking the blue “Publish” button on the upper right side of the screen.