With your new Redback Graphics or Jamncream web hosting account, you (or your website administrator) may have configured one or more new Email addresses in your cpanel.
April 2018 – Important changes may require you to change settings
All servers have new compliance regulations to meet, and as such that requires all email accounts to use an SSL connection. You do not have to purchase SSL certificates, you only have to make changes to your email settings.
For existing clients who are not yet using SSL for your email – you only have to make a couple of changes.
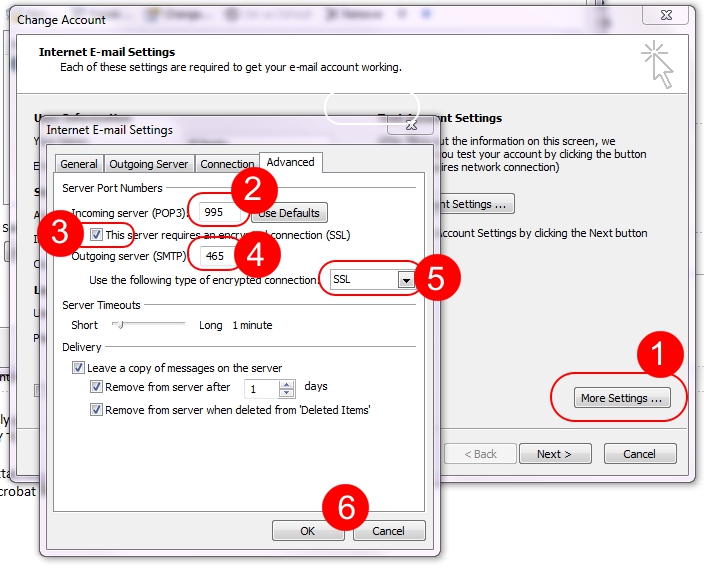
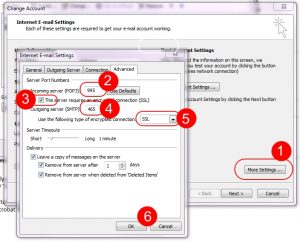 In Outlook (or similar mail client), open the account settings for your email account. Choose the “More” button, then under the Advanced tab:
- Change the Incoming server POP3 port to 995 (for IMAP use port 993).
- Select this servers requires encrypted connection SSL.
- Change the outgoing server (SMTP) to port 465
- Choose SSL for this connection.
- Click OK, and you are finished.
Create a new email account
Login to your cpanel (login details in your hosting email), navigate to the “Mail” section, select “Email accounts”. Add the desired email, password, and select a quota if you want a quota applied to that email address, then “Create Account”, and you are done.
To be able to send and receive from that new Email address you have to add that as a new Email Account to your Email software on your computer. In this example we use Microsoft Outlook. Other Email software will be similar, use this information as a guide only. If you are not sure of what you are doing please do not proceed, but get someone who is familiar with adding new Email accounts to help you.
Add the email account to your email client
(older servers, pre 2017)
This step will allow you to configure an email client, such as Microsoft Office Outlook, Outlook Live (old Hotmail), Windows Mail, Thunderbird.
 During configuration in your email client, you will have the option of setting the mailserver type. You can use either POP (recommended) or IMAP depending on your needs.
Use the following settings:
Username: your full email address (i.e. johnsmith@yourdomain.com.au)*
Password: the password you or your administrator set when creating the email account in your cPanel (in your hosting email)
Incoming Mailserver: mail.yourdomain.com (note: replace yourdomain.com with your domain). For a POP3 account (recommended) use Port 110, IMAP use Port 143
Outgoing Mailserver: Your ISP’s outgoing mail server (port 25 default), OR mail.yourdomain.com (set SMTP Port 587)
 Please make sure that in the “More Settings”, “Advanced” tab of email settings that email is not kept on the server for more than 7 days (3 days in fine).
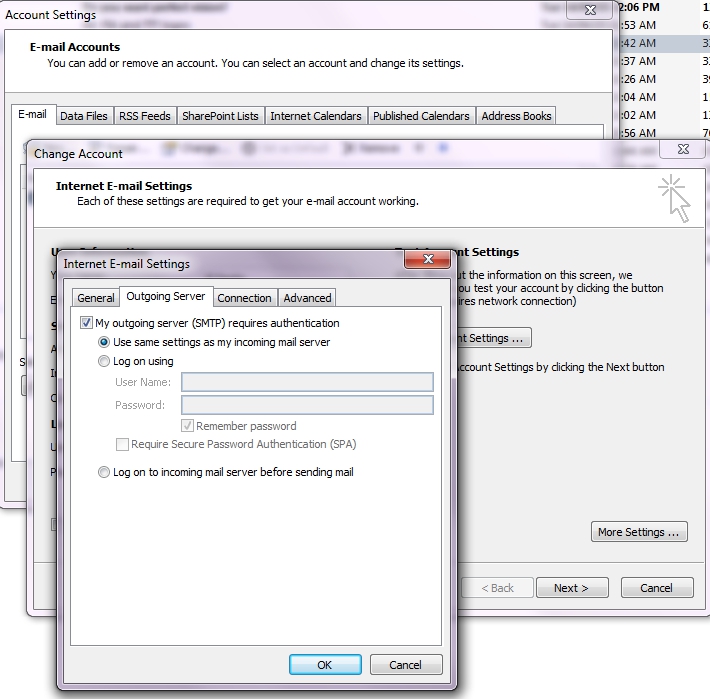
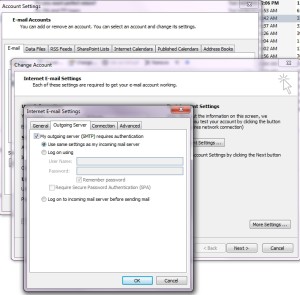 If you’re using our outgoing mail server (mail.yourdomain.com), please ensure “Outgoing Mailserver requires authentication” is enabled, in “More Settings”, “Outgoing Server” tab.
Do not alter any existing Email accounts in Outlook, but you might find it useful to view the properties of an existing Email account to see the existing ISP’s Outgoing Mail Server. If possible use this for your Outgoing Mail Server, if you have trouble with that, then try the mail.yourdomain.com.au with a Port change for your Outgoing Mail Server settings (as explained above).
*Mac users please note
On some mac devices the username may be johnsmith+yourdomain.com.au vs johnsmith@yourdomain.com.au
Add the email account to your email client
(new servers 2018 on)
 New hosting compliance requires that SSL must be used.
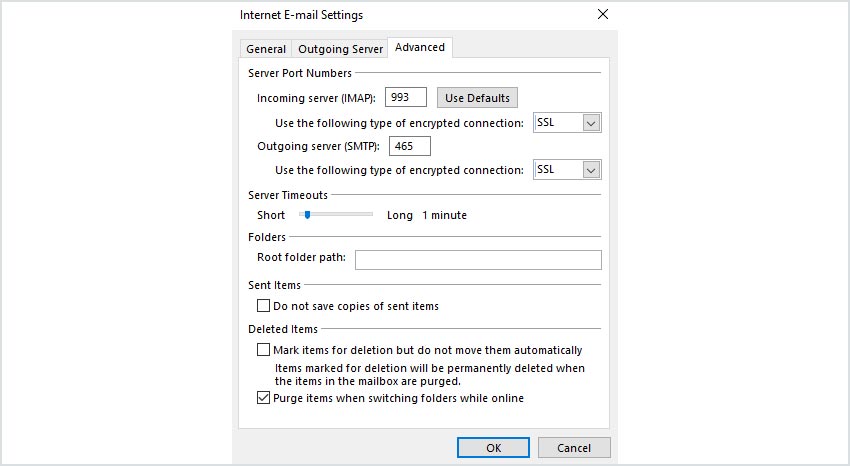
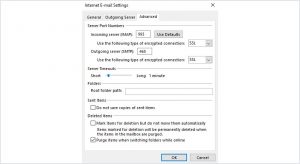
Incoming Mailserver: mail.yourdomain.com (note: replace yourdomain.com with your domain).
For a POP3 account (recommended) use Port 995, IMAP use Port 993.
Outgoing Mailserver: Your ISP’s outgoing mail server (port 25 default), OR mail.yourdomain.com, set SMTP Port 465, with SSL.
Please view screenshot at right for IMAP port 993 (POP3 uses port 995).
IMAP accounts
If you have set up any of your email accounts as IMAP, you will need to periodically remove files from the IMAP account. Files can be moved or copied to a new local folder. Check that emails are accessible from the new folder, then you can safely delete them from IMAP folders. Any files/emails/drafts/archives etc in an IMAP folder remain on the server. Once moved from the IMAP folder they will be removed automatically from the server.
Creating a Local Folder
First check that your Email may already have a “Local Folders” folder (you should see it at the bottom of your email accounts/folders list on the left, when viewing your email). You can add a sub folder to Local Folders, and it will also be a “local folder”.
Instructions for Microsoft Outlook to create a new local folder – follow the same principle in other software, but the navigation items will not be the same.
- Open Microsoft Outlook to access your email account.
- Select Home > New Items > More Items > Outlook Data File.
- Select Outlook Data File (.pst) and select OK.
- Type in a name for your Local Folder, choose its location, and hit OK.
- Type in a descriptive name for your Local Folder. This is the name that will appear in your Outlook screen. Select OK.
- Your Local Folder should now appear in the side of your Outlook window.
- You can now move emails from the IMAP folder to this local folder. Try a couple first to check they are still readable, then you can move large numbers of old emails. You can also check mail on the server via your cpanel to check that it has left the IMAP folder.
Hint for setting up a new email account (POP or IMAP)
It’s often helpful to view the Properties of an existing working Email account before adding a new account. Take note of the existing incoming and outgoing mail servers, but do not change anything in the existing Email account. You can have several accounts, all sending and receiving from the one computer. Once the new Email address has been tested and working, you can set your new Email address as the “Default” Email address, so that all outgoing Emails will be sent from that Email address in future.